Make HDR photos with Adobe Photoshop, What is HDR photo? Photo HDR (High Dynamic Range) is a simple shooting with a range of tonal detail that is very large. This usually requires at least three file photos of different exposures of the same decision and incorporate them into one. The following How to Make HDR photo.
1. Prepare a minimum of three photos, keep its existing view, can be landscapes, buildings or human in my practice examples that focus only object to humans
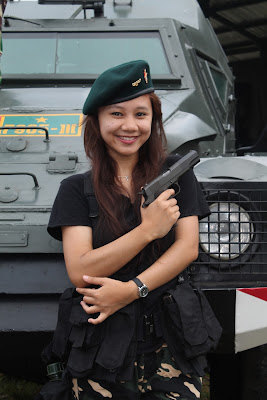 |
| original image |
2. duplicate the original image by (Ctrl + J), change the overlay mode to duplicate the results.
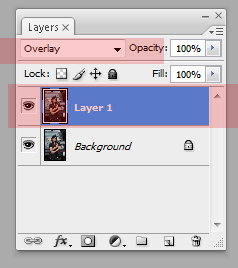 |
| duplicate image (ctrl+j) |
3.Choose Image> Adjustments> Desaturate
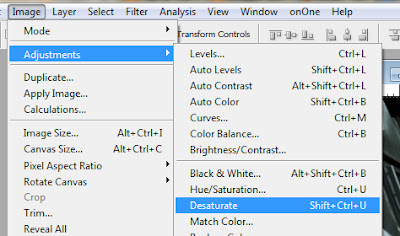 |
| Image > Adjustments > Desaturate |
4. select Image > Adjustments >Invert
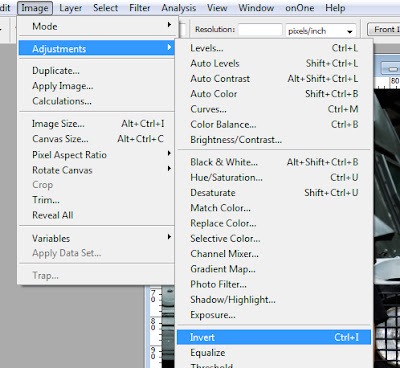 |
| Image > Adjustments >Invert |
5. add Blur effect, Filter-Blur > Gaussian blur
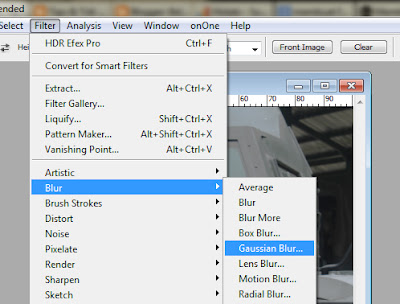 |
| Filter-Blur > Gaussian blur |
 |
| object |
6. Duplicate Layer 1 (Ctrl + J), change the mode to Soft Light, to get some sharpness, you can duplicate the layer mode while playing over and over, for example by adding a mode to Vivid Light. you should consider in Creating HDR photo is the simplest and fill Opacity setting.
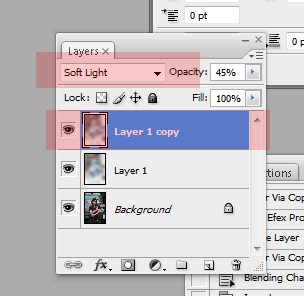 |
duplicate layer
|
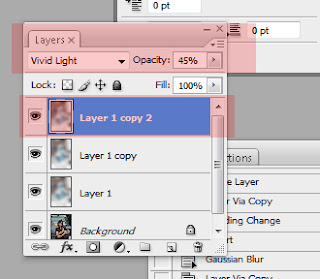 |
| change the mode to Soft Light |
7. For color and lighting problems, you add the Create new fill or adjustment layer for each layer you want. because this will determine the final result of editing.
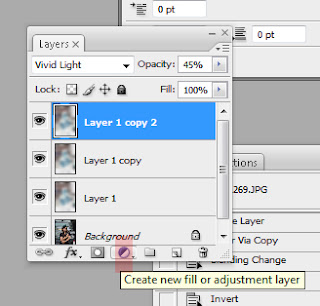 |
| create new fill or adjustment layer |
Final Results
If you want an easier HDR tutorial please go to the plugin, with this plugin topaz you will be easy to create the HDR effect simply a click and point set points to effect dramatic HDR look.okay so the tutorial to Make HDR photos with Adobe Photoshop


0 komentar:
Post a Comment